The many faces of Github
What is Git?
Before you can understand what Github is, you must first understand the concept of Git:
Git is version control software for projects. You can use it to easily jump back to old versions or work with multiple people on a project. You can operate Git either in the command line of your operating system or in Github Desktop, a Git client with a graphical user interface.
You need to know the following commands when working with Git:
git clone [URL]: clone a Git repository from the URL to your local computer.git init: Initialize a Git project locally. You can optionally upload this to Github or another host later.git add: Add files to the watch list. This step is mandatory to upload your work to the repository afterwards.git commit: Use a commit to record the changes. This is a state that you can go back to at any time. Files must be backed up with a commit before they can be sent to a remote repository.git push: With a push, you send all commits to the remote repository on Github’s servers or the chosen other provider.git fetch: Imports commits from a remote repository into the local repo. These commits are stored as remote branches instead of normal local branches. This gives developers the opportunity to review changes before integrating them into their own copies of the project.
What is Github?

Github is the host for your Git projects and has similar features to a social network.
- You can use Git to access your projects stored in Github from anywhere.
- Repositories stored in Github are always public. So other users can view your projects. You can only get private repositories by paying a monthly fee.
- You can also contribute to existing programs by fixing bugs and thus actively contribute to open source tools.
- Github is largely used for large projects in certain programming languages. However, it is just as possible to manage simple documents in Github.
If you want a visualisation of how GitHub works let’s see how Eddie and his team use GitHub:
Difference between Github and Git in a nutshell
- git is a local version control software that enables developers to save snapshots of their projects over time. It’s generally best for individual use.
- GitHub is a web-based platform that incorporates git’s version control features so they can be used collaboratively.
| |
|
|---|---|
| is a software | is a service |
| is installed locally on the system | is hosted on the web |
| is a command line tool | provides a graphical interface |
| is a tool to manage different versions of edits, made to files in a git repository | is a space to upload a copy of the Git repository |
| provides functionalities like Version Control System (VCS) and Source Code Management (SCM) | provides functionalities of Git like VCS and SCM and a few of its own functions like hosting websites |
Setting up Git and Github
Before you can get started with Git and Github, you need a Github account and you need to install Git locally. Here’s how:
- First, create an account on Github. This is pretty straightforward and done quickly without any pitfalls.
- To use Github productively, you need Git on your local computer. Install Git: Choose the installer you need for your operating system.
- On Windows, launch the Git Bash you just installed. On macOS and Linux start the normal terminal.
- With
git config --global user.name "[Name]"you now have to set your name. - As before the name you set with
git config --global user.email "[Mail]"your mail address. Use the same mail here that you specified on the Github page beforehand.
Github Tutorial: Setting up a repository
If you want to get started with a project, you can create a repository in two ways:
First:
- To create a new repository on the Github page click on the
+next to your profile picture on the top right corner. - Give your project a name. As described above, you will need to set the project to public or pay a monthly fee for privacy.
- Then click on the
Create repositorybutton. You can then add the repository locally using git clone as described above.
Second:
- Locally, you create a repository with
git init. Then you can link a local and an online repo withgit remote add origin https://github.com/[username]/[projectname].git. - You now have an online repository on Github and can thus manage your projects and use them from anywhere.
To go through a fully accompanied installation and set up watch this Git & GitHub Crash Course For Beginners from Traversy Media
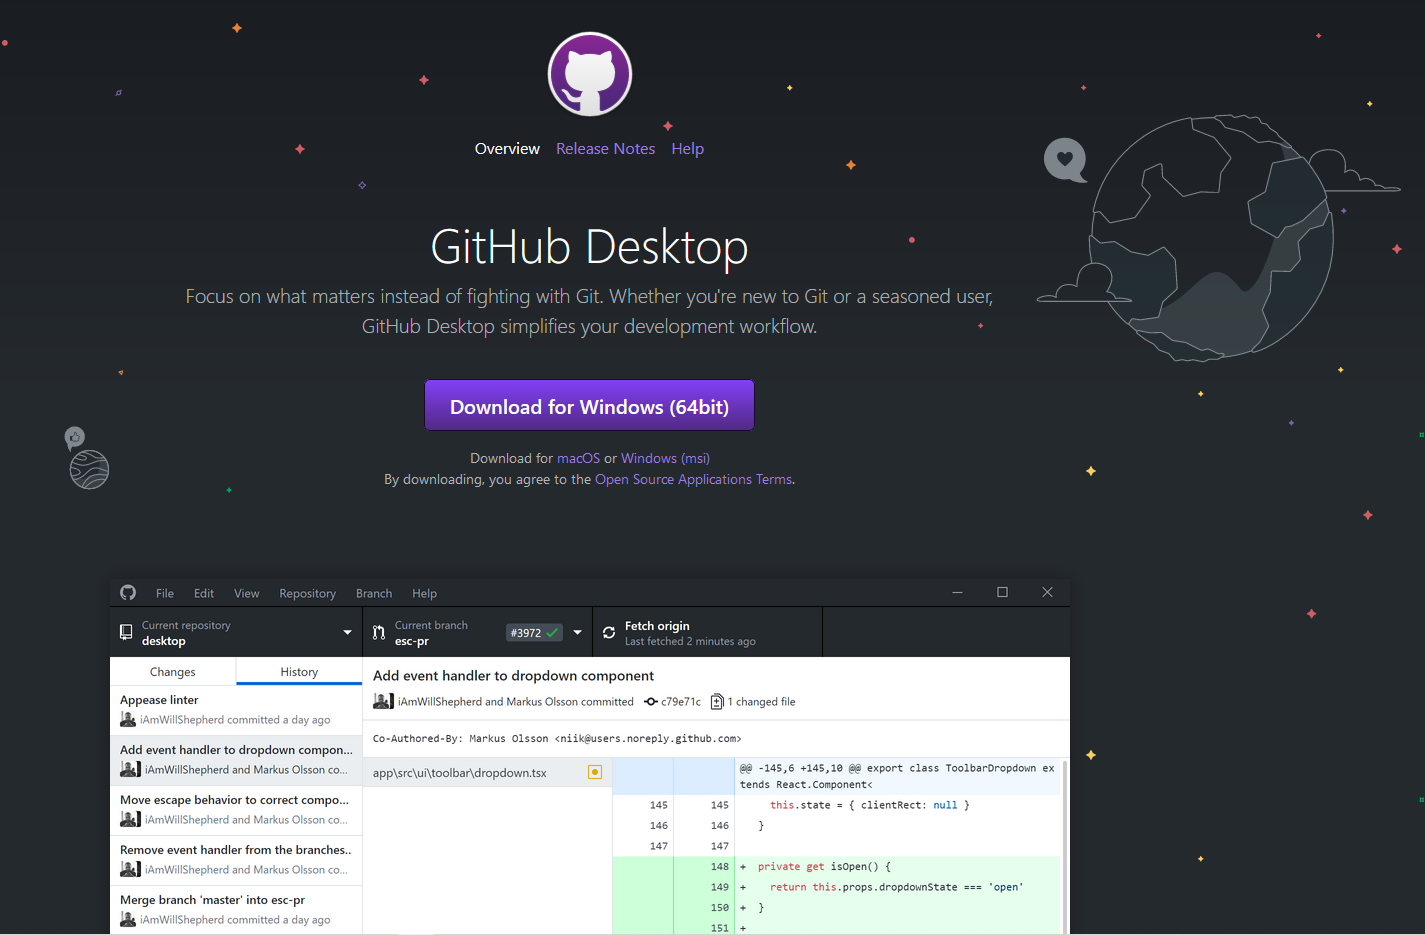
GitHub Desktop
Focus on what matters instead of fighting with Git. Whether you’re new to Git or a seasoned user, GitHub Desktop simplifies your development workflow. GitHub Desktop will allow us to easily start using version control by offering a Graphical User Interface (GUI) to use Git. A GUI allows users to interact with a program using a visual interface rather than relying on text commands.

Step by Step introduction to GitHub Desktop:
1. Download Github Desktop
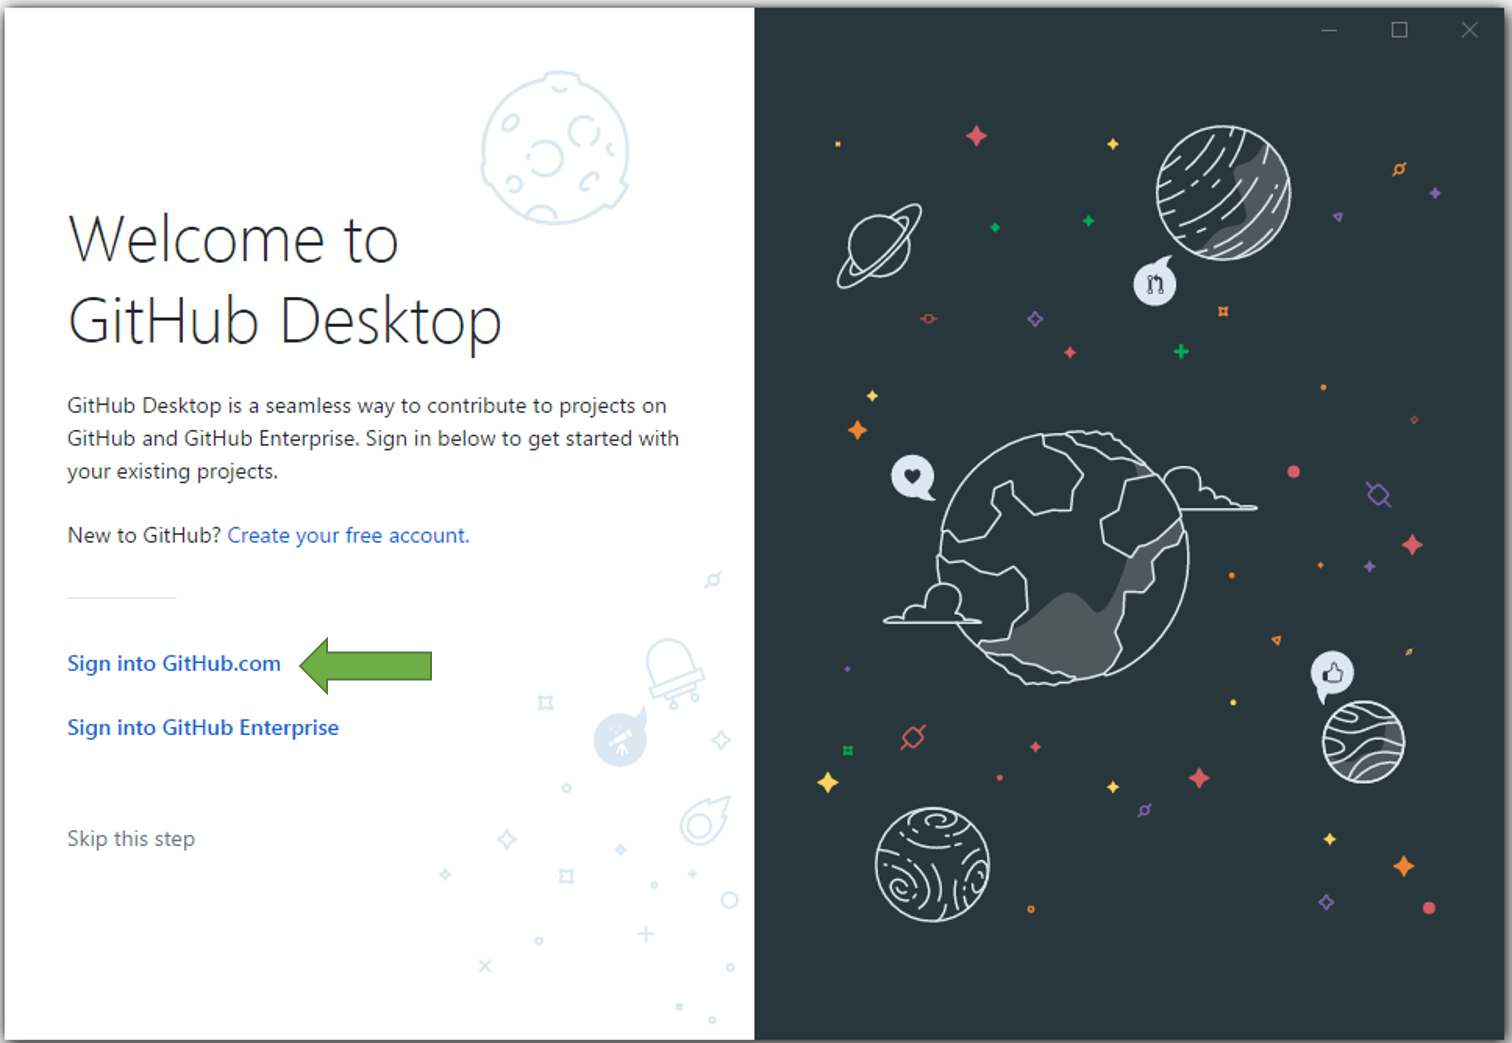
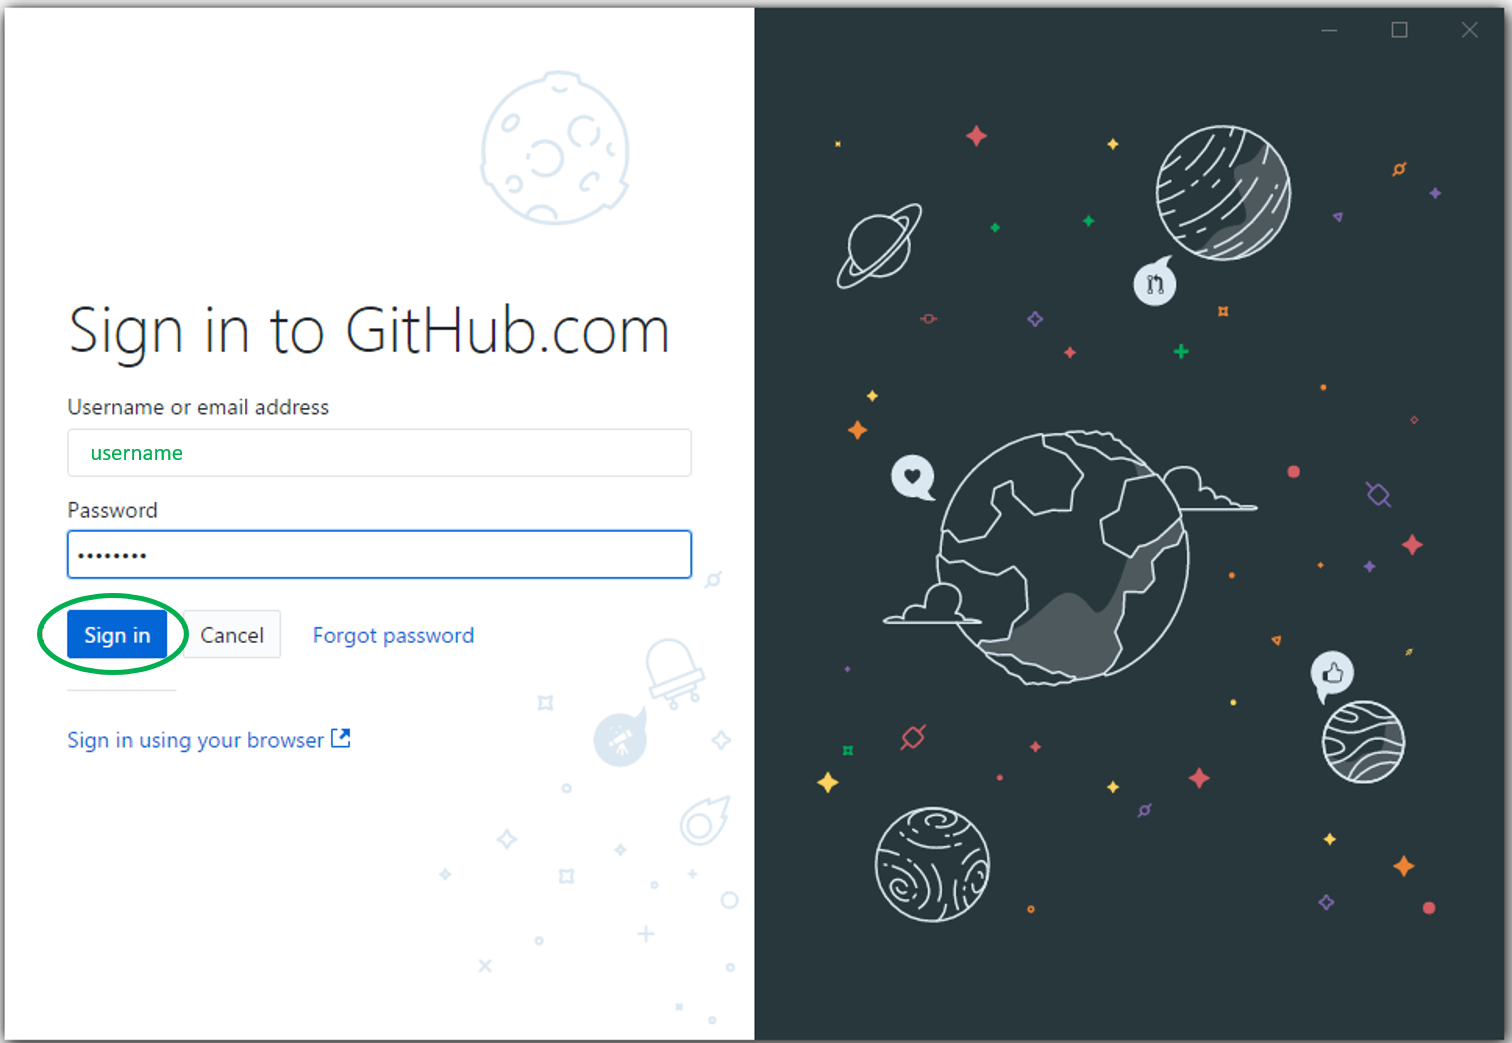
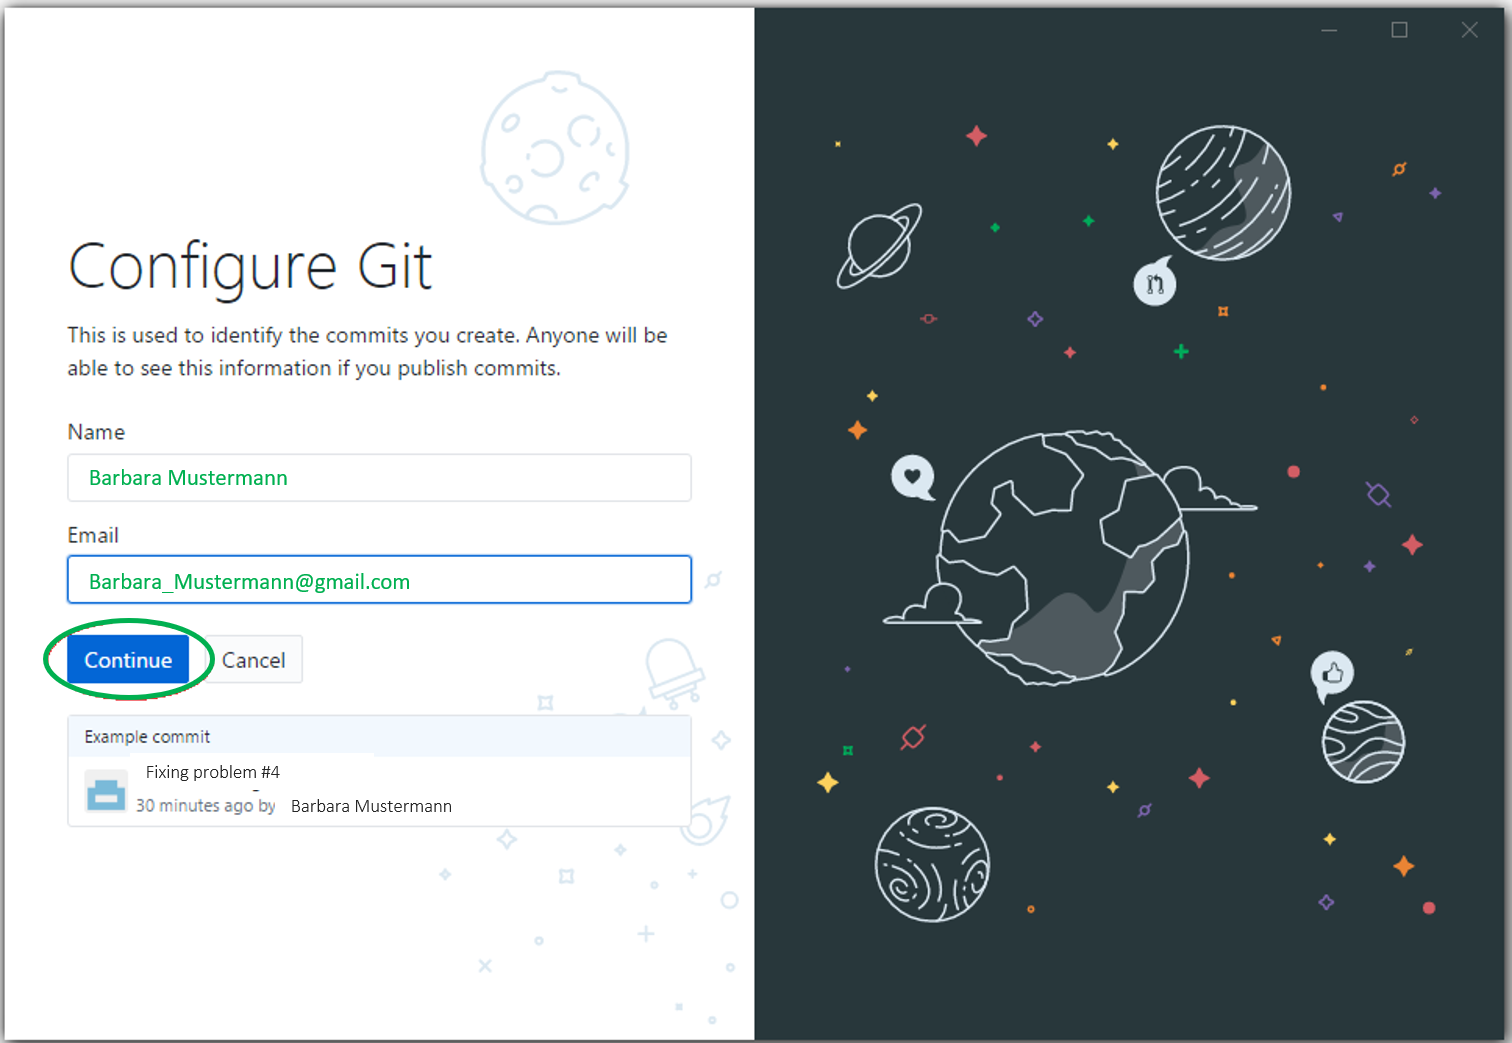
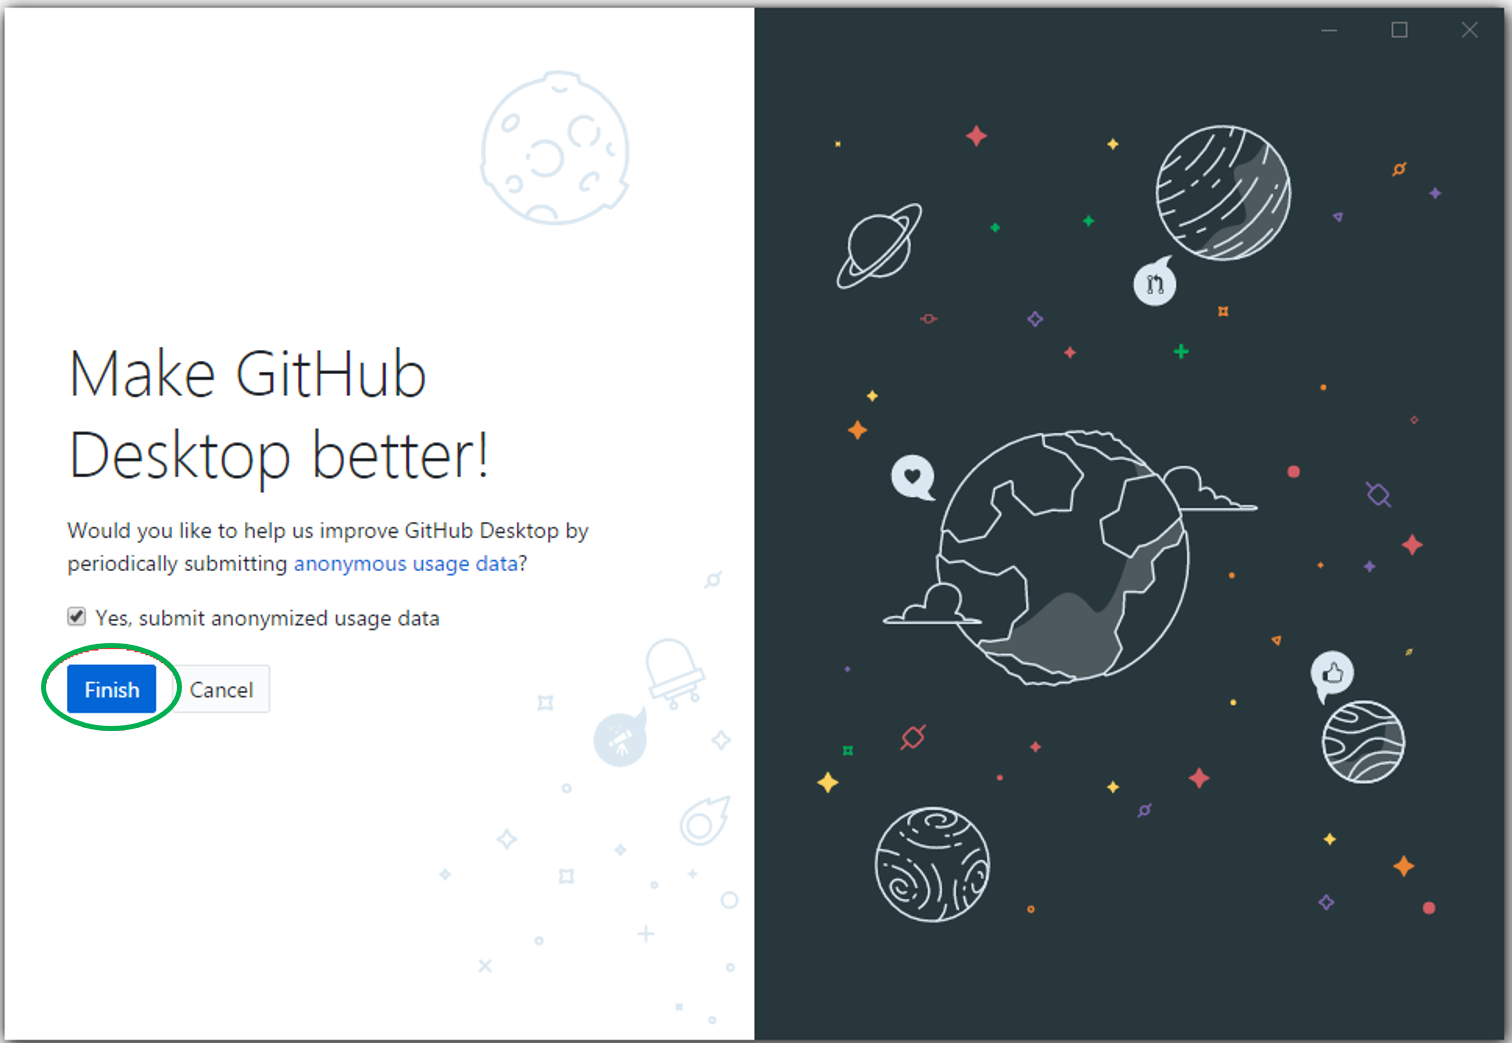
2. Log in to GitHub Desktop to connect to your GitHub account.
3. So far there is no Local Repository on your computer.
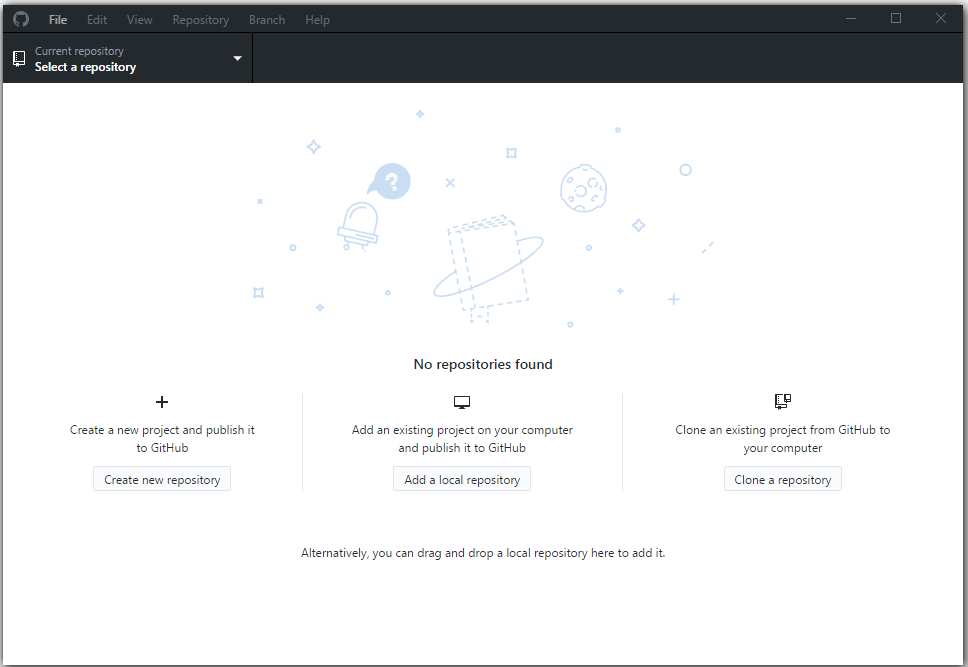
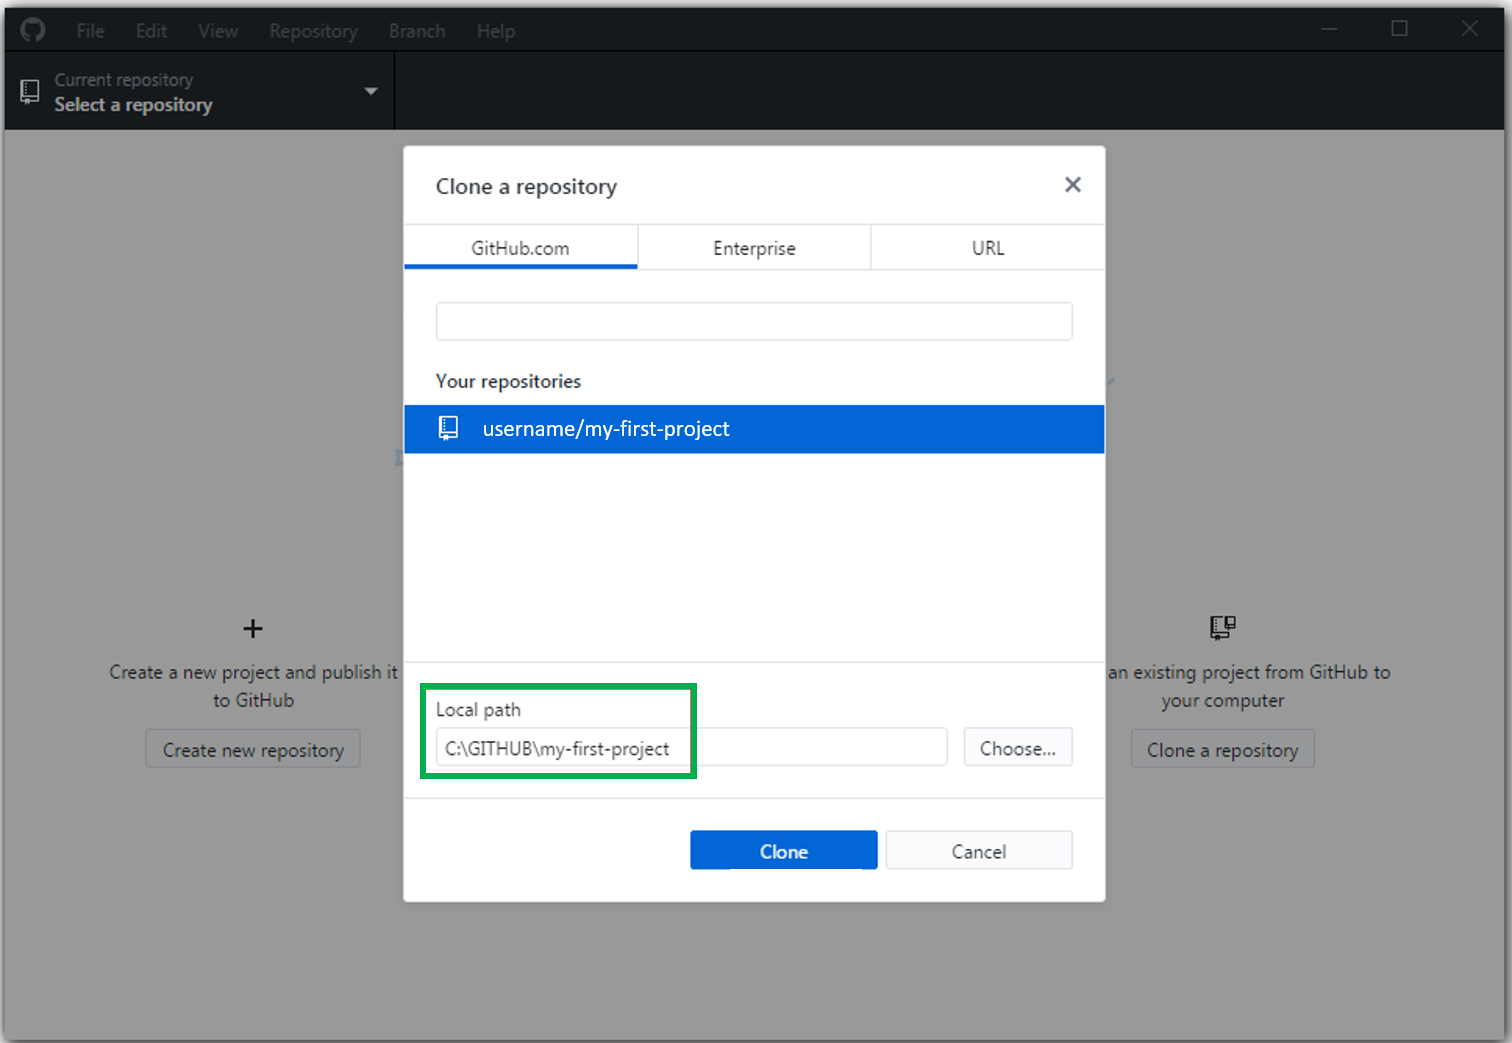
4. First, you should choose an empty folder to store the local data. For example C:/GITHUB/.
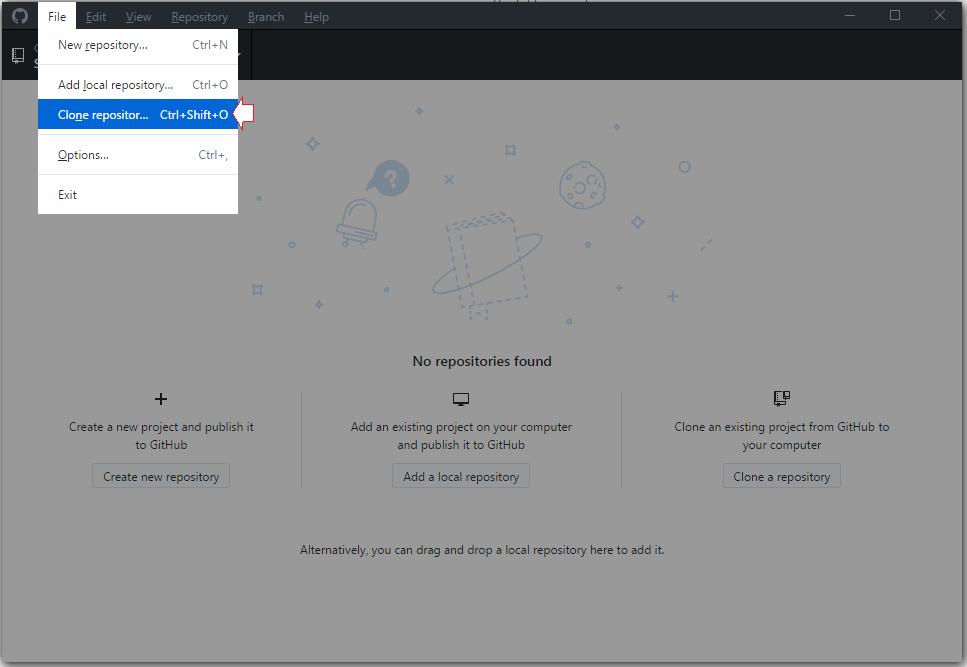
Second, select a repository you created on GitHub to clone a version in your local computer and you will see a local repository.
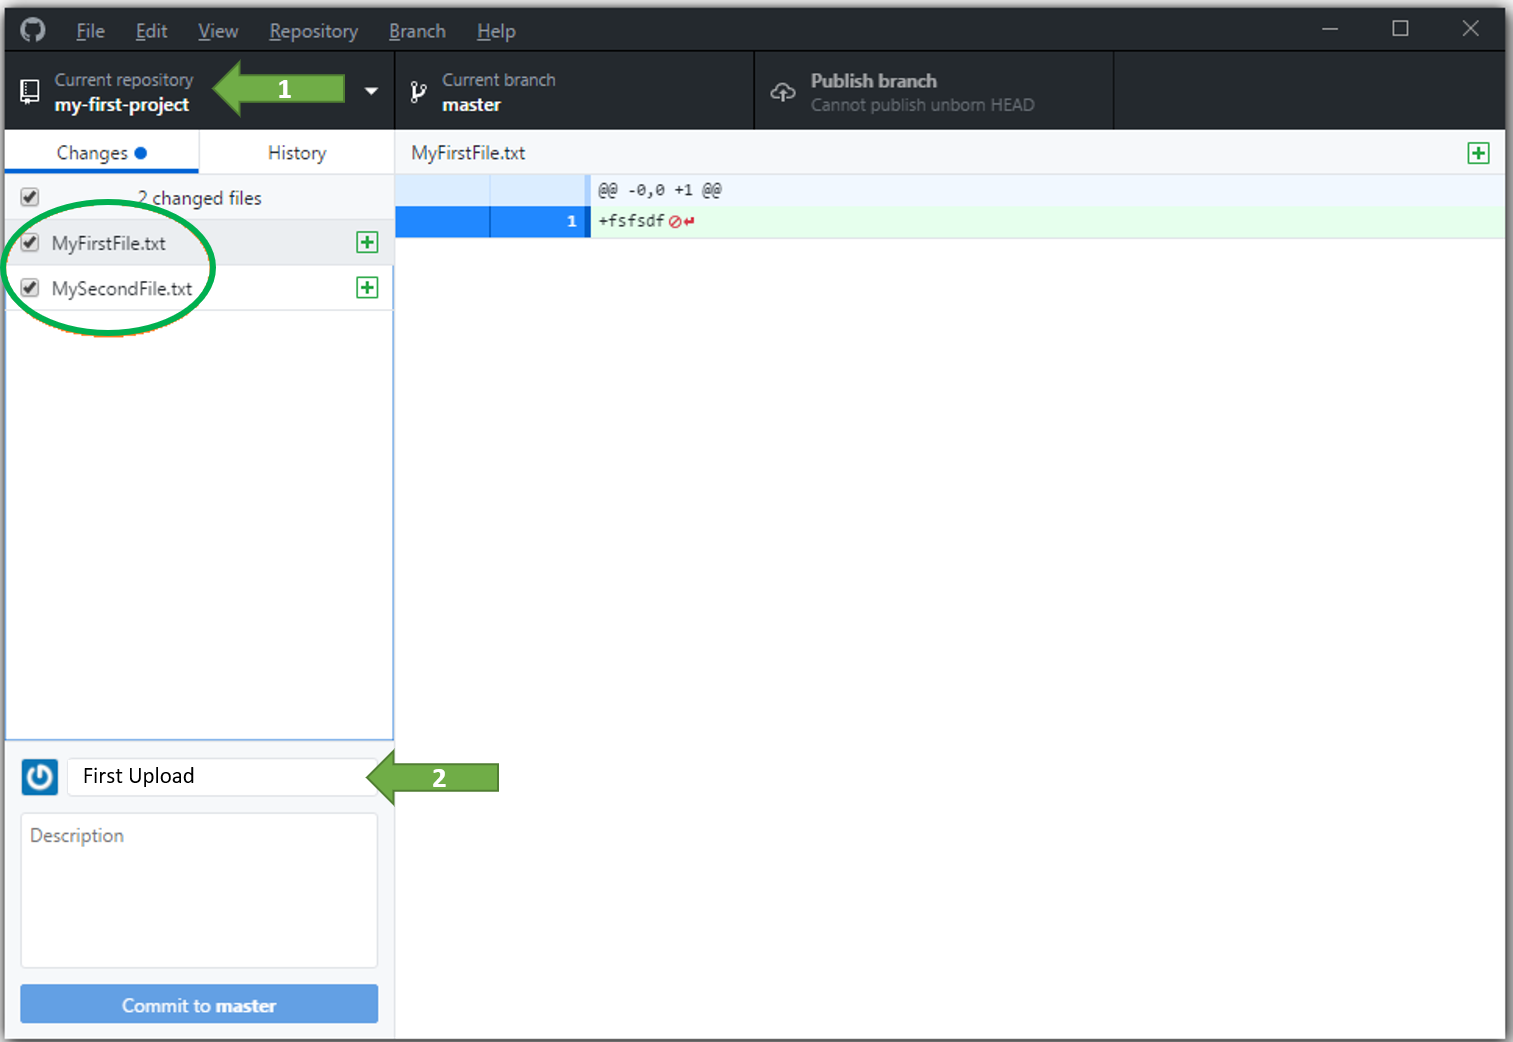
5. Copy some .txt files to the local repository on your computer. GitHub Desktop immediately recognizes changes in that repository. To publish your changes add a detailed summary (mandatory) and and a description. Then click commit.
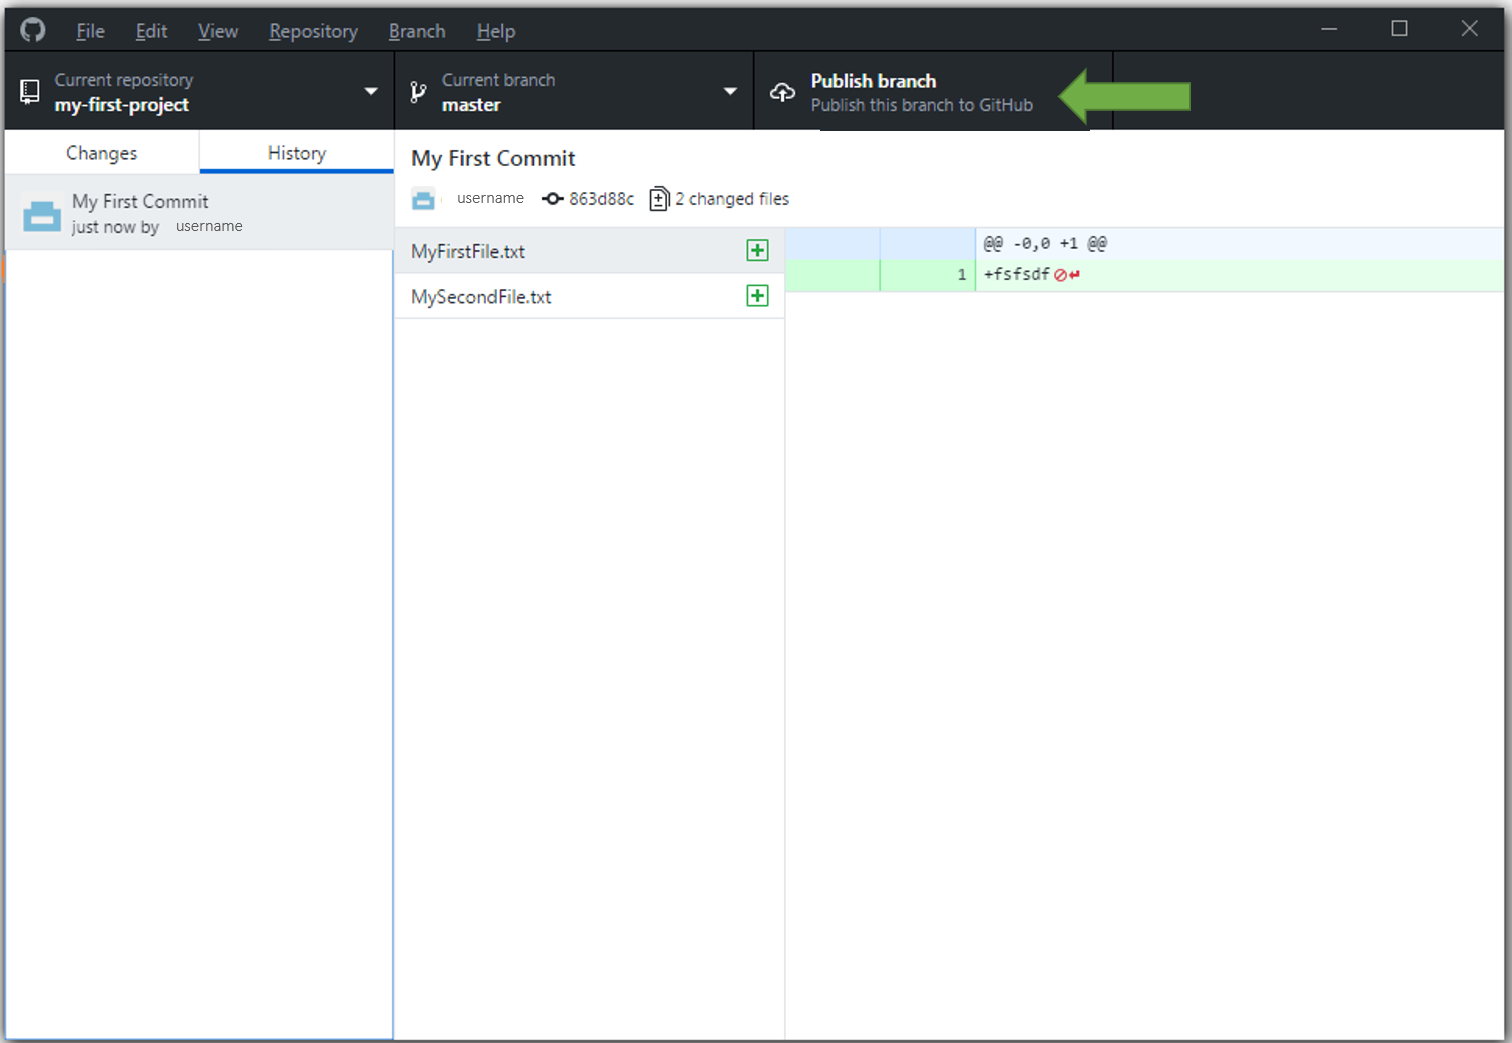
6. Click Publish branch (on the top of the GitHub Desktop window) to make the local branch also available on origin (GitHub). Remember, there are usually two versions of a branch — the local version and the remote version. Make sure you get the updates you and your collaborators merged into the masterbranch online into your local copy. In your GitHub Desktop GUI client, click the Fetch origin button. Fetch gets the latest updates from origin but doesn’t update your local working copy with the changes. After you click Fetch origin, the button changes to Pull Origin. Click Pull Origin to update your local working copy with the fetched updates.
Further Information on: Activity: Use the GitHub Desktop client
Github Desktop introduction A quick intro for GitHub Desktop on Windows:
Git Bash Console
Git provides a BASH emulation used to run Git from the command line. Simply right-click on a folder in Windows Explorer to access the BASH or GUI. Bash is an acronym for “Bourne Again Shell”. A shell is a terminal application that interfaces with an operating system through written commands. *NIX users should feel right at home, as the BASH emulation behaves just like the “git” command in LINUX and UNIX environments.
| Command | Description |
|---|---|
| Getting & Creating Projects | |
git init |
Initialize a local Git repository |
git clone ssh://git@github.com/[username]/[repository-name].git |
Create a local copy of a remote repository |
| Basics | |
git status |
Check status |
git add [file-name.txt] |
Add a file to the staging area |
git add -A |
Add all new and changed files to the staging area |
git commit -m "[commit message]" |
Commit changes |
git rm -r [file-name.txt] |
Remove a file (or folder) |
| Sharing & Updating Projects | |
git push origin [branch name] |
Push a branch to your remote repository |
git push -u origin [branch name] |
Push changes to remote repository (and remember the branch) |
git push |
Push changes to remote repository (remembered branch) |
git pull |
Update local repository to the newest commit |
git pull origin [branch name] |
Pull changes from remote repository |
| Inspection & Comparison | |
git log |
View changes |
git log --summary |
View changes (detailed) |
git log –oneline` |
View changes (briefly) |
git diff [source branch] [target branch] |
Preview changes before merging |
Git Bash introduction How to upload files to github from Git Bash on Windows from scratch from Amarindaz
Github in RStudio
Once you’ve installed Git, you’ll need to activate it on your system by following these steps:
Part 1
Tell RStudio where to find the Git installation
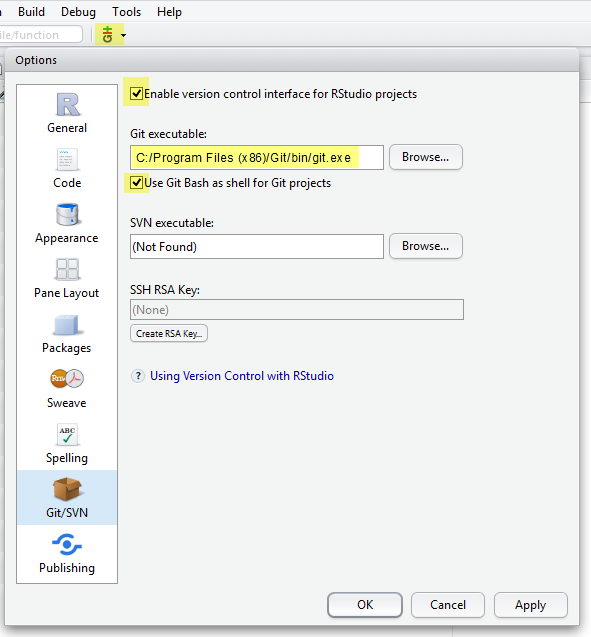
- Open RStudio and go to Tools > Global Options… click on Git/SVN
- Check Enable version control interface for RStudio projects
- Set the path to the Git executable that you just installed. Open a shell, if you don’t know where Git is installed.
- Windows: type where git and hit enter. The path should be something like: C:/Program Files (x86)/Git/bin/git.exe
- Linux/OS X: type which git and hit enter. The path should be something like: /usr/bin/git
- Restart RStudio, if it worked out you will find the Git icon on the top toolbar, as shown below.
Setup Git
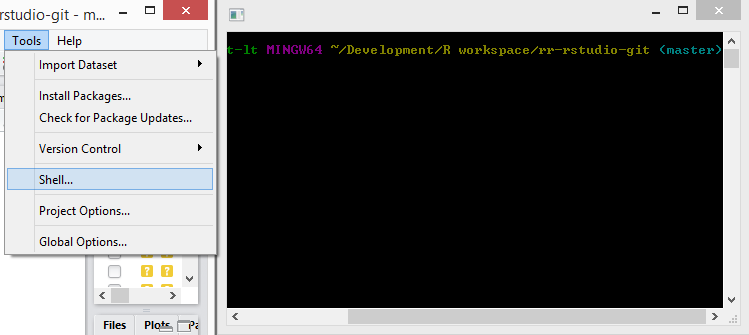
Configure Git and set your user name and email (the email address you used to register on GitHub). You can directly open the Git prompt from within RStudio. User name and email needs to be set only once. Go to Tools > Shell to open the Git Shell to tell Git your username and GitHub email.
git config --global user.name 'yourGitHubUsername'
git config --global user.email 'name@provider.com'
Part 2
Create a new RStudio project with Git
There are three ways to create version control for a RStudio project.
a) Create a new project and create a local Git repository:
Select File > New Project.., create a project from a New Directory and check the option Create a git repository. In order to push to a remote repository later on you add that remote repository by using the Git shell. If you already know which online repository you want to use for your projects, option c) is more convenient.
b) Create a new project from a folder under version control:
In this case you only need to create a new RStudio project for that directory and version control is automatically enabled. Go to File > New Project, select create a new project from an Existing Directory and create the project.
c) Create a new project based on a remote Git repository:
Select File > New Project.. and from the opening menu select to create a new project from Version Control, choose Git, then provide the repository url (use the https link of the url if you want to avoid all the ssh trouble) from the the repository you want to clone and create the project.
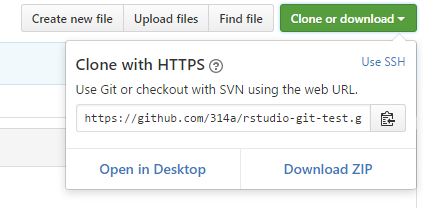
To create a new Git based project in RStudio, we need the repository url. You find the repository HTTPS url on the just created GitHub project page. There press the button Clone or download and copy the HTTPS link of the project by clicking the little icon to the right of the URL. The link will be something like https://github.com/yourusername/rstudio-git-test.git
That’s it. All you need to know about Git, Git Desktop, Github, Git Bash and Git integration in RStudio.
See you in the next Spotlight Introduction to CSS in R Markdown.