| EX | Sentinel-2 Preparation |
Things you need for this exercise
- A shapefile of the study area, buffered to 8000m (see below)
- The name of Sentinel image collection - “COPERNICUS/S2_SR_HARMONIZED” (read here)
- Parameters to download Sentinel-2 data (see below)
- A folder in your google drive to store the downloaded image
Data acquisition and first steps
- Download the buffered shapefile for Kilimanjaro southern slope here.We use the buffered area to avoid the error regarding “multiple geometries”.
- Once downloaded, open GEE code editor and head to “Assets”, click on “New” and upload your shapefile with a suitable name (e.g. “study_area_kili”)
- Please ensure the file formats - “.shp”, “.shx”, “.dbf”, “.prj” or “zip”. The file format “.qmd” is not supported.
- Once the shapefile is uploaded and available as an asset, you can proceed with the coding exercise.
- Plot an RGB of Sentinel-2 scene for Kilimanjaro southern slope for 13 January 2022.
// Define the study area
var studyArea = ee.FeatureCollection('projects/ee-netra805kili/assets/buffered_8000m_veg_aug1_kili_ses')
// Import Sentinel-2 data and filter by date and study area
var startDate = '2022-01-13';
var endDate = '2022-01-14'; // One day after the start date
var sentinel2 = ee.ImageCollection('COPERNICUS/S2_SR_HARMONIZED')
                  .filterDate(startDate, endDate)
                  .filterBounds(studyArea);
// Clip the images to the study area
var clippedImage = sentinel2.median().clip(studyArea);
// Visualization parameters for RGB
var visParams = {bands: ['B4', 'B3', 'B2'], min: 0, max: 3000};
// Add the RGB layer to the map
Map.addLayer(clippedImage, visParams, 'RGB of Study Area');
// Optionally, add the study area outline to the map
Map.addLayer(studyArea, {color: 'red'}, 'Study Area');
// Center the map on the study area
Map.centerObject(studyArea, 10); // Adjust zoom level as needed
- Save the downloaded files in the google drive folder.
// Export the full-band image, specifying scale and region
Export.image.toDrive({
  image: clippedImage,
  description: 'Sentinel2_FullBand_Image',
  folder: 'GEE_Folder', // specify your drive folder name
  fileNamePrefix: 'Sentinel2_FullBand',
  region: studyArea,
  scale: 10, // Adjust the scale according to your needs
  maxPixels: 1e9, // Adjust if more pixels are needed
  fileFormat: 'GeoTIFF'
});
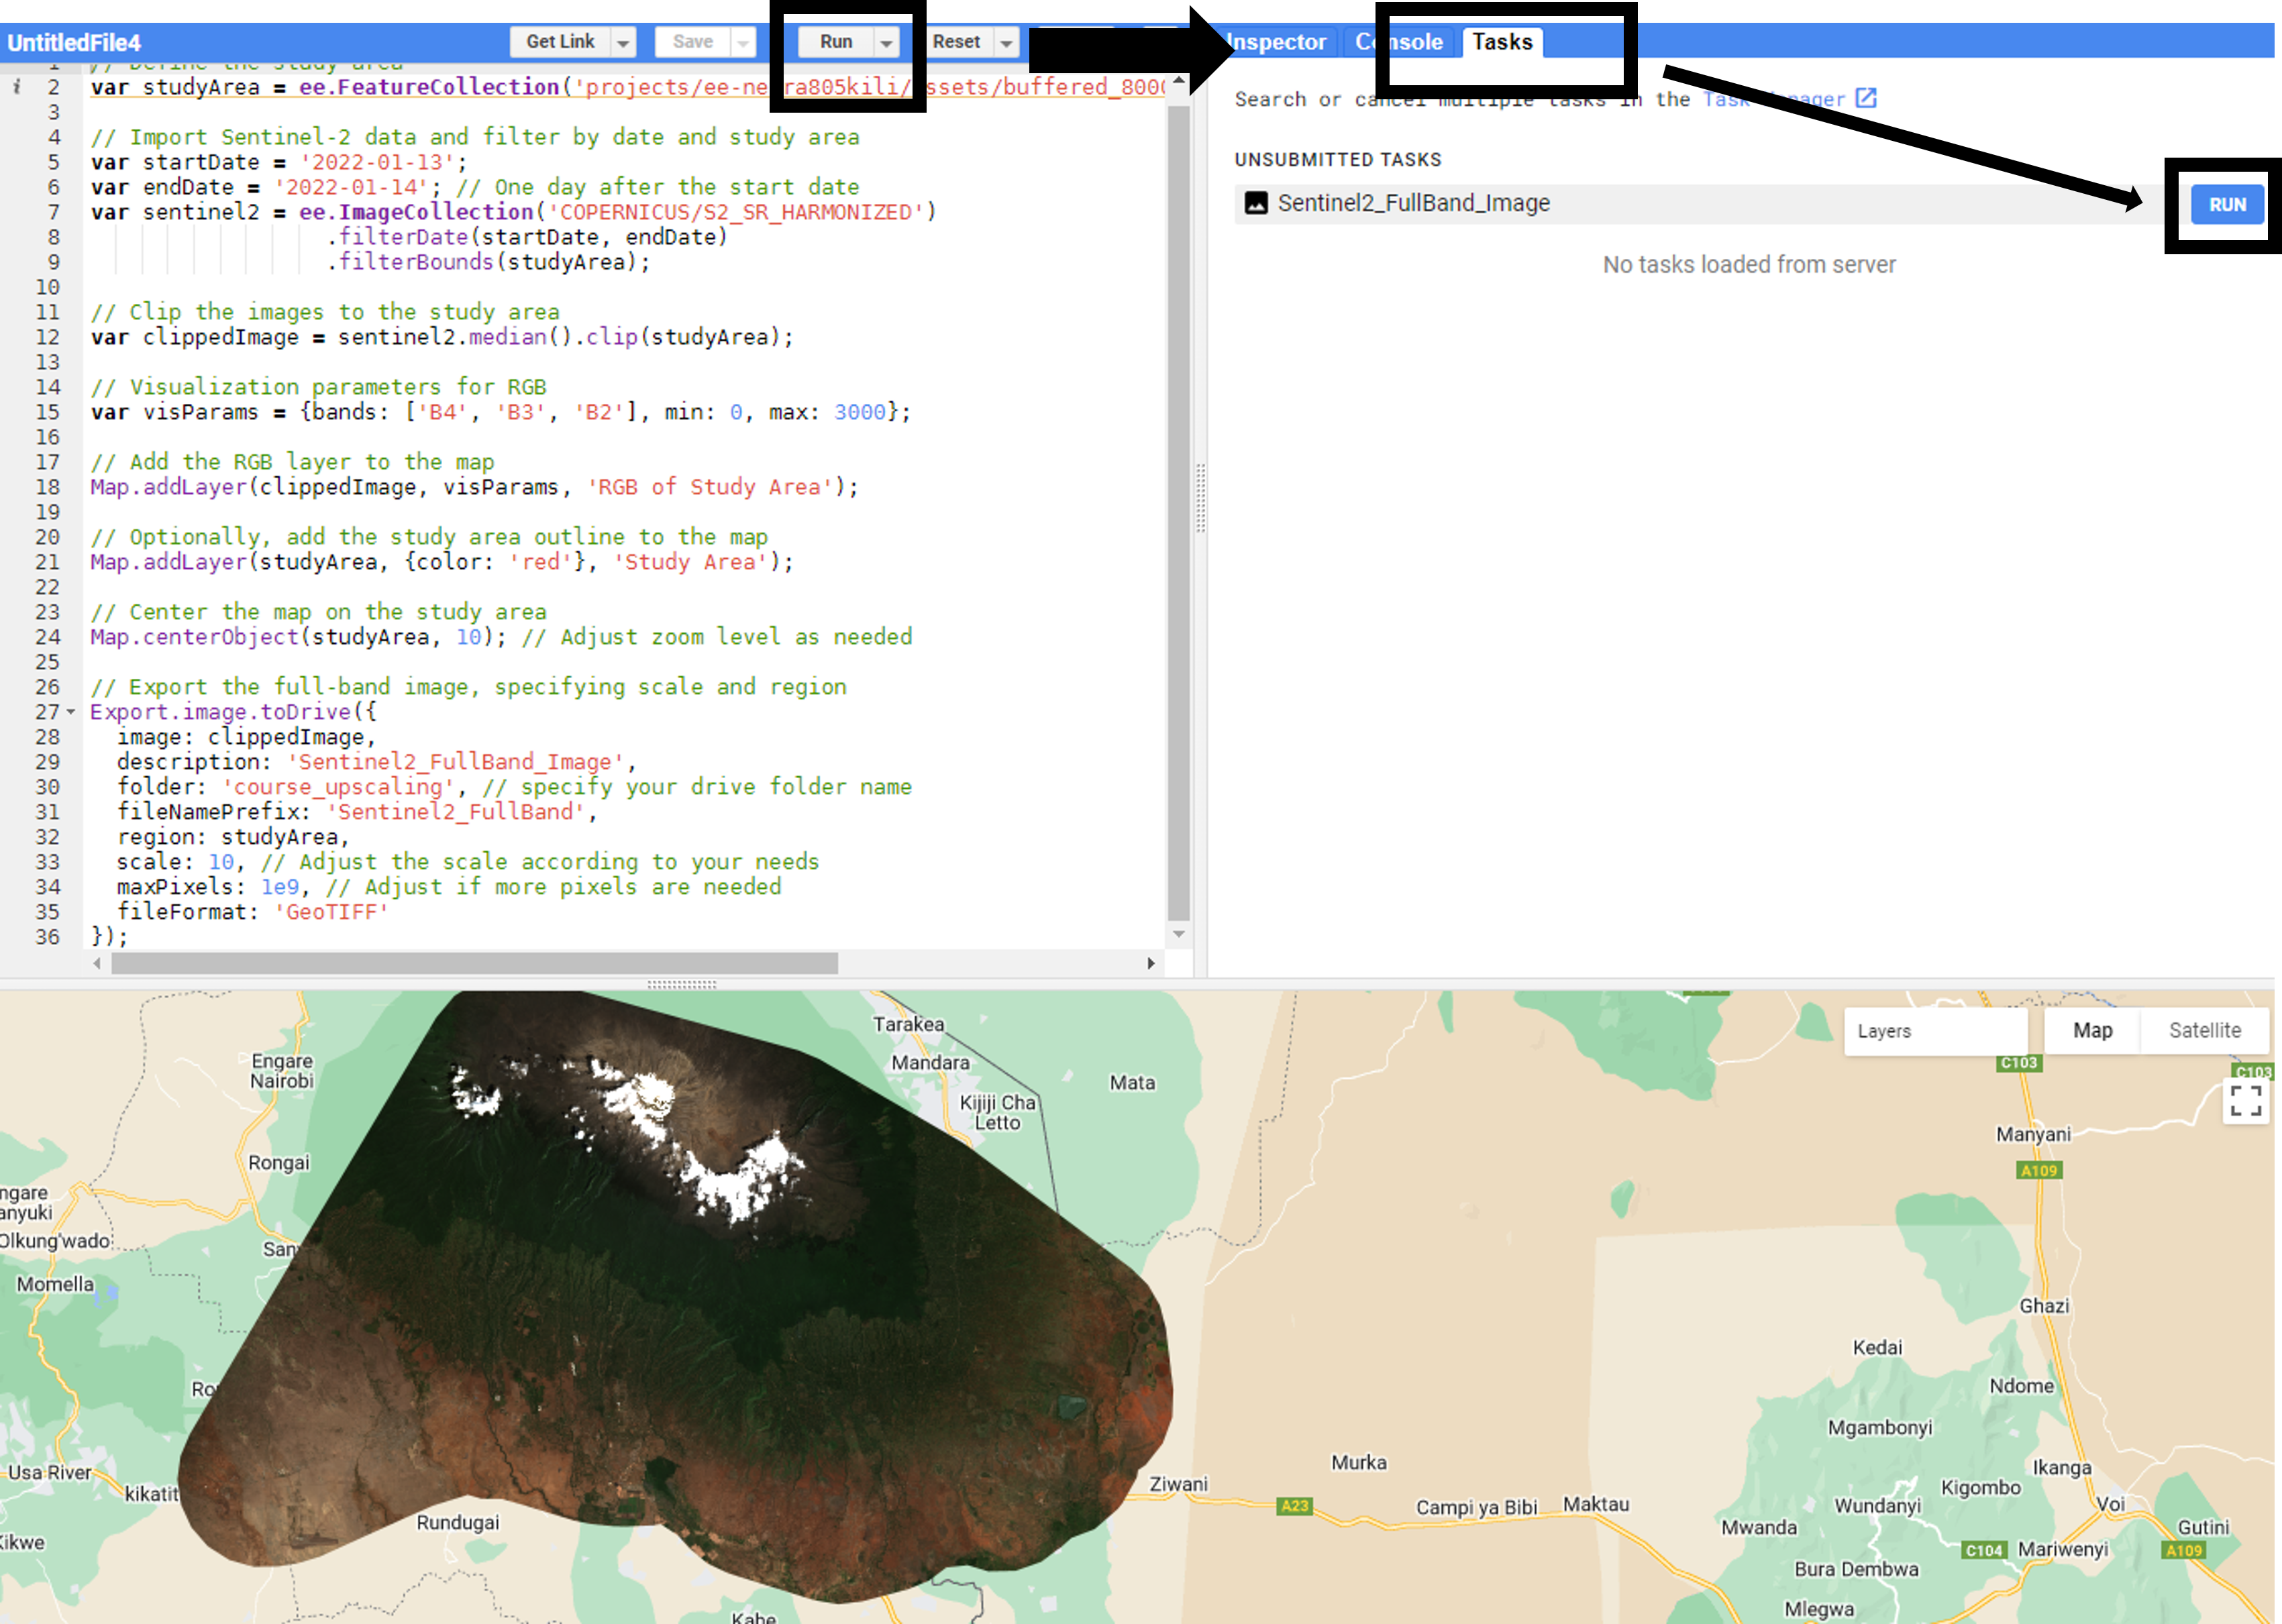
- When you hit run you will see the “Task” button highlighted in yellow on the right side of the editor. Click on it and then click on “RUN”.
- Tip - if you have multiple images follow the instructions given here

- Next you will be prompted to save the image. Enter the following :
- Task name - Sentinel2_FullBand_Image
- Coordinate reference system - EPSG32737
- Scale - 10
- Driver folder - write your folder name where you want to store it
- Filename - Sentinel2_FullBand
- File format - GEO_TIFF
